Most of us use popular twitter clients such as TweetDeck, Seesmic which are developed using Adobe AIR. One thing I like about these clients is that they show notifications when the application is in the minimized mode. Now with browsers implementing webkit such as Google chrome one can use the notification API to send notification to the browser. In this blog post I will be explaining how one can implement webkit notifications in their web application.
Before we get started with creating notifications we need to check whether the Browser supports the Notification API. This is a simple:
The next step would be to get user permissions to show notifications from the website:
The createNotification method used here displays the notification to the user on the bottom right corner of the screen. For example when the user clicks on a button he will shown a notification with a welcome message:
The notification shown contains a picture, title as 'Sagar' and the message 'Welcome'. It also provides information such as the website from which the notification is shown and an option to Dismiss the message. The options button allows user to disable notifications from the website.
Strictly speaking this is not a part of HTML5 specification rather it is a webkit feature. Therefore this may work only with browsers implementing webkit.
Before we get started with creating notifications we need to check whether the Browser supports the Notification API. This is a simple:
if(window.webkitNotifications)
//your browser supports Notifications
else
//switch to other browser that support Notifications
//your browser supports Notifications
else
//switch to other browser that support Notifications
The next step would be to get user permissions to show notifications from the website:
if (window.webkitNotifications.checkPermission() == 0) {
//show notification code
}
else {
//request for permission and then show notification code
window.webkitNotifications.requestPermission();
}
The checkPermission method returns '0' if the website has granted permission to show notifications and returns '1' otherwise. The requestPermission method requests the user to provide permission to show notifications. Once the user has provided the permission the next step would be to show the notification to the user://show notification code
}
else {
//request for permission and then show notification code
window.webkitNotifications.requestPermission();
}
showMessageAsNotification = function() {
window.webkitNotifications.createNotification('image','title','content').show();
}
window.webkitNotifications.createNotification('image','title','content').show();
}
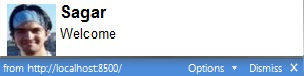
The createNotification method used here displays the notification to the user on the bottom right corner of the screen. For example when the user clicks on a button he will shown a notification with a welcome message:

The notification shown contains a picture, title as 'Sagar' and the message 'Welcome'. It also provides information such as the website from which the notification is shown and an option to Dismiss the message. The options button allows user to disable notifications from the website.
Strictly speaking this is not a part of HTML5 specification rather it is a webkit feature. Therefore this may work only with browsers implementing webkit.
eh? is this really part of HTML5 or just something that works only on webkit-based browser??
ReplyDeleteYes Henry, you are right. I have updated my blog.
ReplyDelete